
This procedure is valid for NVRs whose code ends with 4K, 4K-VS2 or 4AI.
For this tutorial we use an SF-VI101-2, SF-NVR6104-4K and SF-NVR8208A-4K-4AI KIT.
Basically the SF-VI101-2 device should be added to the NVR using a custom communication protocol.

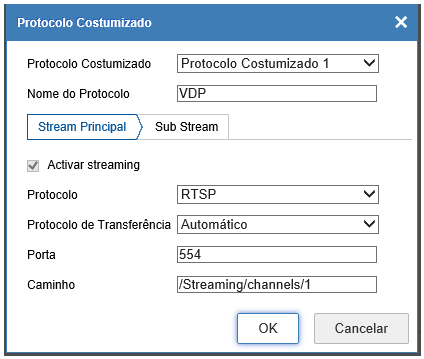
For this we must access the configuration option of the NVR, then click on CAMERA CONTROL and then choose the option "CUSTOM PROTOCOL".
We must customize a protocol by adding the following path: /Streaming/channels/1 as shown in the image below:
We have to repeat the procedure for the Sub Stream.
The next step is to add the SF-VI101-2 device with the protocol we have customized.
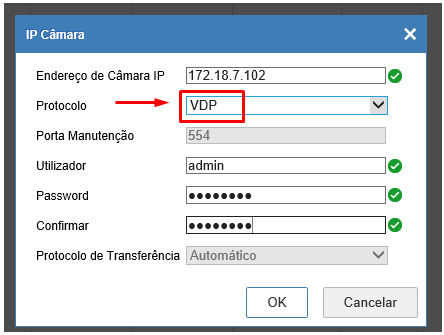
Beware, we must correctly choose the custom protocol previously created, so in this case we select "VDP" as it was the name we applied at the moment of customization.
We then set information such as IP address, user and password.
Once these procedures are done we wait a few seconds and then we will have confirmation that the NVR has connected with the intercom.

Once these steps are performed, we can view the image directly on the NVR and also perform recordings.